For The King 2 is not a game about finding one unstoppable hero. It is about building four imperfect adventurers whose strengths cover one another's weaknesses. A Scholar may provide dependable magical damage, a durable frontliner can protect the back row, and a fast support character may rescue the group before a dangerous enemy takes its turn.
Every campaign combines tabletop-style stat rolls, roguelite progression, procedural exploration and turn-based combat on a tactical grid. Luck always matters, but careful players control how much influence it receives. Focus guarantees critical roll slots, positioning limits enemy options, and good equipment turns a risky statistic into a dependable one.
This guide covers party composition, loadouts, Focus management, Battle Grid tactics, equipment, status effects, exploration, towns, dungeons, landboats, pets, co-op coordination and the decisions that most often decide whether a campaign reaches its final chapter.
Essential For The King II Tips
- Build a party that can deal both physical and magical damage.
- Match every weapon to the character statistic used by its attacks.
- Inspect the roll slots before replacing a reliable weapon.
- Keep fragile ranged heroes in the back row whenever their weapons allow it.
- Spread the party across the grid when enemies use area attacks.
- Save Focus for important attacks, quest tests and emergency movement.
- Carry healing on more than one character.
- Visit towns before entering dungeons or major quest encounters.
- Do not split the party immediately before a required battle.
- Buy affordable upgrades early instead of waiting forever for perfect equipment.
- Use markers to coordinate routes in multiplayer.
- Inspect every new enemy before committing to a long or expensive attack.
- Prepare multiple damage types and utility weapons.
- Treat timeline objectives as deadlines rather than optional suggestions.
- Level and equip pets according to the job missing from the party.
Build a Party, Not Four Individuals
A character may look strong on their own but still contribute little to the group. Party creation should begin with roles rather than favourite classes.
A balanced group normally benefits from:
- A durable front-row hero.
- A reliable physical attacker.
- A reliable magical attacker.
- A fast support, control or healing option.
- Several different primary statistics.
- At least one useful area attack.
Avoid Four Heroes Competing for the Same Gear
When several characters depend on the same statistic and weapon category, every good drop creates competition. A mixed party uses a wider selection of loot efficiently.
Cover Both Defensive Types
Physical armour and magical resistance are separate concerns. A party that deals only one damage type can struggle against enemies built to resist it.
Speed Is a Team Resource
Fast heroes act earlier and may have the opportunity to heal, control or eliminate a threat before it moves. Do not evaluate Speed only as a personal statistic.
Choose Classes with Compatible Roles
Class names are useful starting points, but equipment determines much of what a hero can do during a campaign.
When choosing a class, consider:
- Its strongest statistics.
- Likely weapon categories.
- Starting equipment.
- Passive abilities.
- Whether it belongs in the front or back row.
- How it complements the other three characters.
Do Not Build Around Four Damage Dealers
Raw damage is useful until the party needs healing, cleansing, protection or crowd control. At least one hero should have the flexibility to solve non-damage problems.
Redundancy Can Be Healthy
Two heroes capable of emergency healing are safer than relying on a single character who may become stunned, defeated or separated.
Use Loadout Points to Improve the Opening
Campaign loadouts provide resources or equipment before the run begins. Spend them to solve the dangerous first few rounds rather than planning only for the distant endgame.
Useful early loadout goals include:
- Reliable weapons.
- Extra healing.
- Exploration or vision bonuses.
- Gold for early services.
- Equipment that corrects a party weakness.
Early Consistency Beats Late Potential
A modest weapon that reliably hits is often more valuable than a theoretically stronger item the party may not find for several levels.
Coordinate Loadouts in Co-op
Do not let every player choose the same type of utility. Discuss who brings healing, exploration tools, money or defensive equipment.
Match Weapons to Character Statistics
Every attack rolls against a particular statistic. A large damage number does not compensate for consistently failing several slots.
Before equipping a weapon, check:
- The statistic used by its skills.
- The number of roll slots.
- Its physical or magical damage.
- The target pattern.
- Any status effects.
- Penalties or immunities.
Reliability Is Damage
A slightly weaker attack that succeeds regularly can deal more total damage than a powerful move that fails half its roll.
Do Not Change Statistics to Fit One Drop
Equip weapons that suit the character unless the new item is strong enough to justify changing several pieces of gear.
Keep a Secondary Weapon
A backup can provide another damage type, reach pattern or utility effect when the primary weapon is poorly suited to an encounter.
Count the Roll Slots
Weapons with more roll slots can have stronger perfect-roll effects, but each additional slot creates another opportunity to fail.
A many-slot weapon is more attractive when:
- The hero has a very high matching statistic.
- Focus is available.
- Its perfect-roll effect is exceptional.
- The fight is important enough to justify the risk.
Fewer Slots Improve Consistency
A compact weapon can be ideal for routine encounters and low-Focus situations.
Inspect Partial-Roll Results
Some skills still function after an imperfect roll, while others lose most of their value. Read the complete skill card.
Spend Focus Where Failure Matters
Focus is the main tool for controlling uncertainty. It should be treated as a strategic reserve rather than spent whenever the button becomes available.
Good Focus uses include:
- Finishing an enemy before its turn.
- Landing a critical status effect.
- Passing an important quest check.
- Gaining movement needed to reunite the party.
- Securing a boss punish.
- Avoiding a severe failure penalty.
Do Not Guarantee What Is Already Likely
A hero with an excellent matching stat may need only one Focus point or none at all during an ordinary fight.
Reserve Focus Before Dungeons
Multi-room encounters provide fewer opportunities to recover. Enter with enough Focus for at least one emergency action per important hero.
Spend Focus to Prevent More Expensive Losses
Using one point to defeat an enemy can be cheaper than consuming several healing items after allowing it another turn.
Restore Focus Deliberately
Focus is valuable only when it can be used. Make restoration part of the route rather than remembering it immediately before a boss.
Look for opportunities through:
- Towns and services.
- Sanctums or beneficial locations.
- Consumables.
- Equipment effects.
- Class abilities.
- Safe downtime between objectives.
Do Not Waste Restoration
Use existing Focus before consuming an item that would restore more than the character can hold.
Distribute Focus Needs
A party where every hero depends heavily on Focus can exhaust its supply quickly. Include characters and weapons capable of reliable natural rolls.
Respect the Battle Grid
The Battle Grid turns positioning into part of every combat build. Rows and columns determine who can be targeted, which attacks connect and how area effects spread.
Put Durable Heroes in Front
Front-row positions are suited to characters with strong defences, shields, taunts or short-range weapons.
Protect Fragile Specialists
Magic users, ranged attackers and support heroes generally benefit from the back row when their skills retain full reach.
Check Reach Before Combat
A short-range weapon may force its user into the front. Do not discover this only after a dangerous encounter begins.
Reposition When the Enemy Formation Changes
Summons, knockback and deaths can alter safe lanes. The opening setup does not have to remain unchanged for the entire fight.
Spread Out Against Area Attacks
Enemies can target rows, columns and adjacent spaces. A tightly packed formation may allow one action to damage most of the party.
Spread heroes when:
- An enemy attacks complete rows.
- A spell targets adjacent spaces.
- A boss repeatedly punishes one column.
- The party does not need adjacency for protection or support.
Cluster Only for a Benefit
Some shields, buffs or skills reward nearby allies. Group together when that benefit outweighs the enemy's area damage.
Study the Preview
The highlighted Battle Grid pattern reveals which positions the selected action affects. Read it before confirming.
Use Shields and Guarding Intelligently
A shield-bearing hero can protect vulnerable allies when placed correctly. Defence is strongest when the grid position and enemy targeting pattern support it.
Use protection to:
- Keep a healer alive.
- Preserve a low-health damage dealer.
- Absorb attacks from a dangerous front-row enemy.
- Create time for an ally to recover.
Do Not Protect a Hero Who Is Already Safe
Move or guard according to the actual enemy targets rather than applying defence automatically.
Defensive Turns Can Win Long Fights
An action that prevents a knockout may provide more value than another partial-damage attack.
Prioritise Enemies by Function
The largest enemy is not always the most dangerous. Inspect skills and the initiative timeline before choosing a target.
High-priority enemies often include:
- Healers.
- Summoners.
- Fast enemies acting soon.
- Support units applying buffs.
- Enemies with strong area attacks.
- Targets capable of stunning or disabling key heroes.
Remove Turns from the Timeline
Defeating one enemy completely is often better than leaving several injured opponents able to act.
Interrupt Important Actions
Use control effects when an enemy's upcoming turn is more dangerous than the damage you could deal directly.
Watch the Initiative Timeline
Turn order tells you how much time remains before each enemy acts.
Use it to decide whether to:
- Finish a weak target.
- Heal immediately.
- Apply a stun or slow effect.
- Move a threatened hero.
- Spend Focus on a guaranteed result.
Fast Support Heroes Are Extremely Valuable
Acting before an enemy allows a support character to rescue an ally or prevent damage entirely.
Do Not Heal Too Late
If several enemies act before the healer, the injured hero may not survive long enough to receive help.
Balance Physical and Magical Damage
Enemies can have very different armour and resistance values. A varied party can attack whichever defence is weaker.
Inspect Before Choosing the Damage Type
Compare the enemy's defensive values and select the weapon or hero capable of exploiting the lower one.
Carry Utility Weapons
A secondary magical weapon on a physical hero, or the reverse, can solve an awkward defence even when it is not the character's normal choice.
Do Not Ignore Piercing and Armour-Breaking Effects
A lower-damage attack that bypasses or reduces defence may improve the entire party's following turns.
Use Status Effects as Force Multipliers
Burning, bleeding, shock, wet and other conditions can alter an encounter beyond their immediate damage.
A status-focused action is valuable when it:
- Weakens a durable enemy over several rounds.
- Creates synergy with another hero's skill.
- Reduces the target's reliability.
- Prevents or delays a dangerous turn.
- Forces the enemy to spend time recovering.
Check Immunities
Do not repeatedly attempt a condition against an immune target. Inspect the enemy card before spending Focus or a consumable.
Cleanse Dangerous Effects Early
A damaging or disabling condition becomes more expensive the longer it remains active.
Carry Healing on Several Heroes
A single healer or single stack of Godsbeard creates a dangerous point of failure.
Distribute recovery so that:
- More than one hero can respond in an emergency.
- Separated characters retain a healing option.
- The entire supply is not lost when one hero falls.
- The fastest hero can heal before the enemy acts.
Heal Before the Knockout
Revival and lost turns are usually more expensive than preventing defeat.
Do Not Waste Group Healing
When an item or ability heals several nearby allies, use it after meaningful damage has accumulated across the group.
Restock Before Dungeons
A dungeon is not the place to discover that every Godsbeard remained on a hero who cannot use it in time.
Explore as a Formation
Splitting the party can reveal more map tiles, but distance affects combat support, item sharing and access to encounters.
Stay Close Before Major Objectives
Required fights and dungeons should normally be entered with the full group available.
Split Only with a Clear Benefit
Reasonable goals include:
- Visiting two nearby towns.
- Revealing safe terrain.
- Collecting an unguarded objective.
- Preparing transport.
- Reaching a nearby sanctum.
Set a Meeting Point
Place a marker and decide when the party will reunite before sending heroes in different directions.
Do Not Leave the Slowest Hero Behind
The group is only as mobile as the character who must still reach the next mandatory battle.
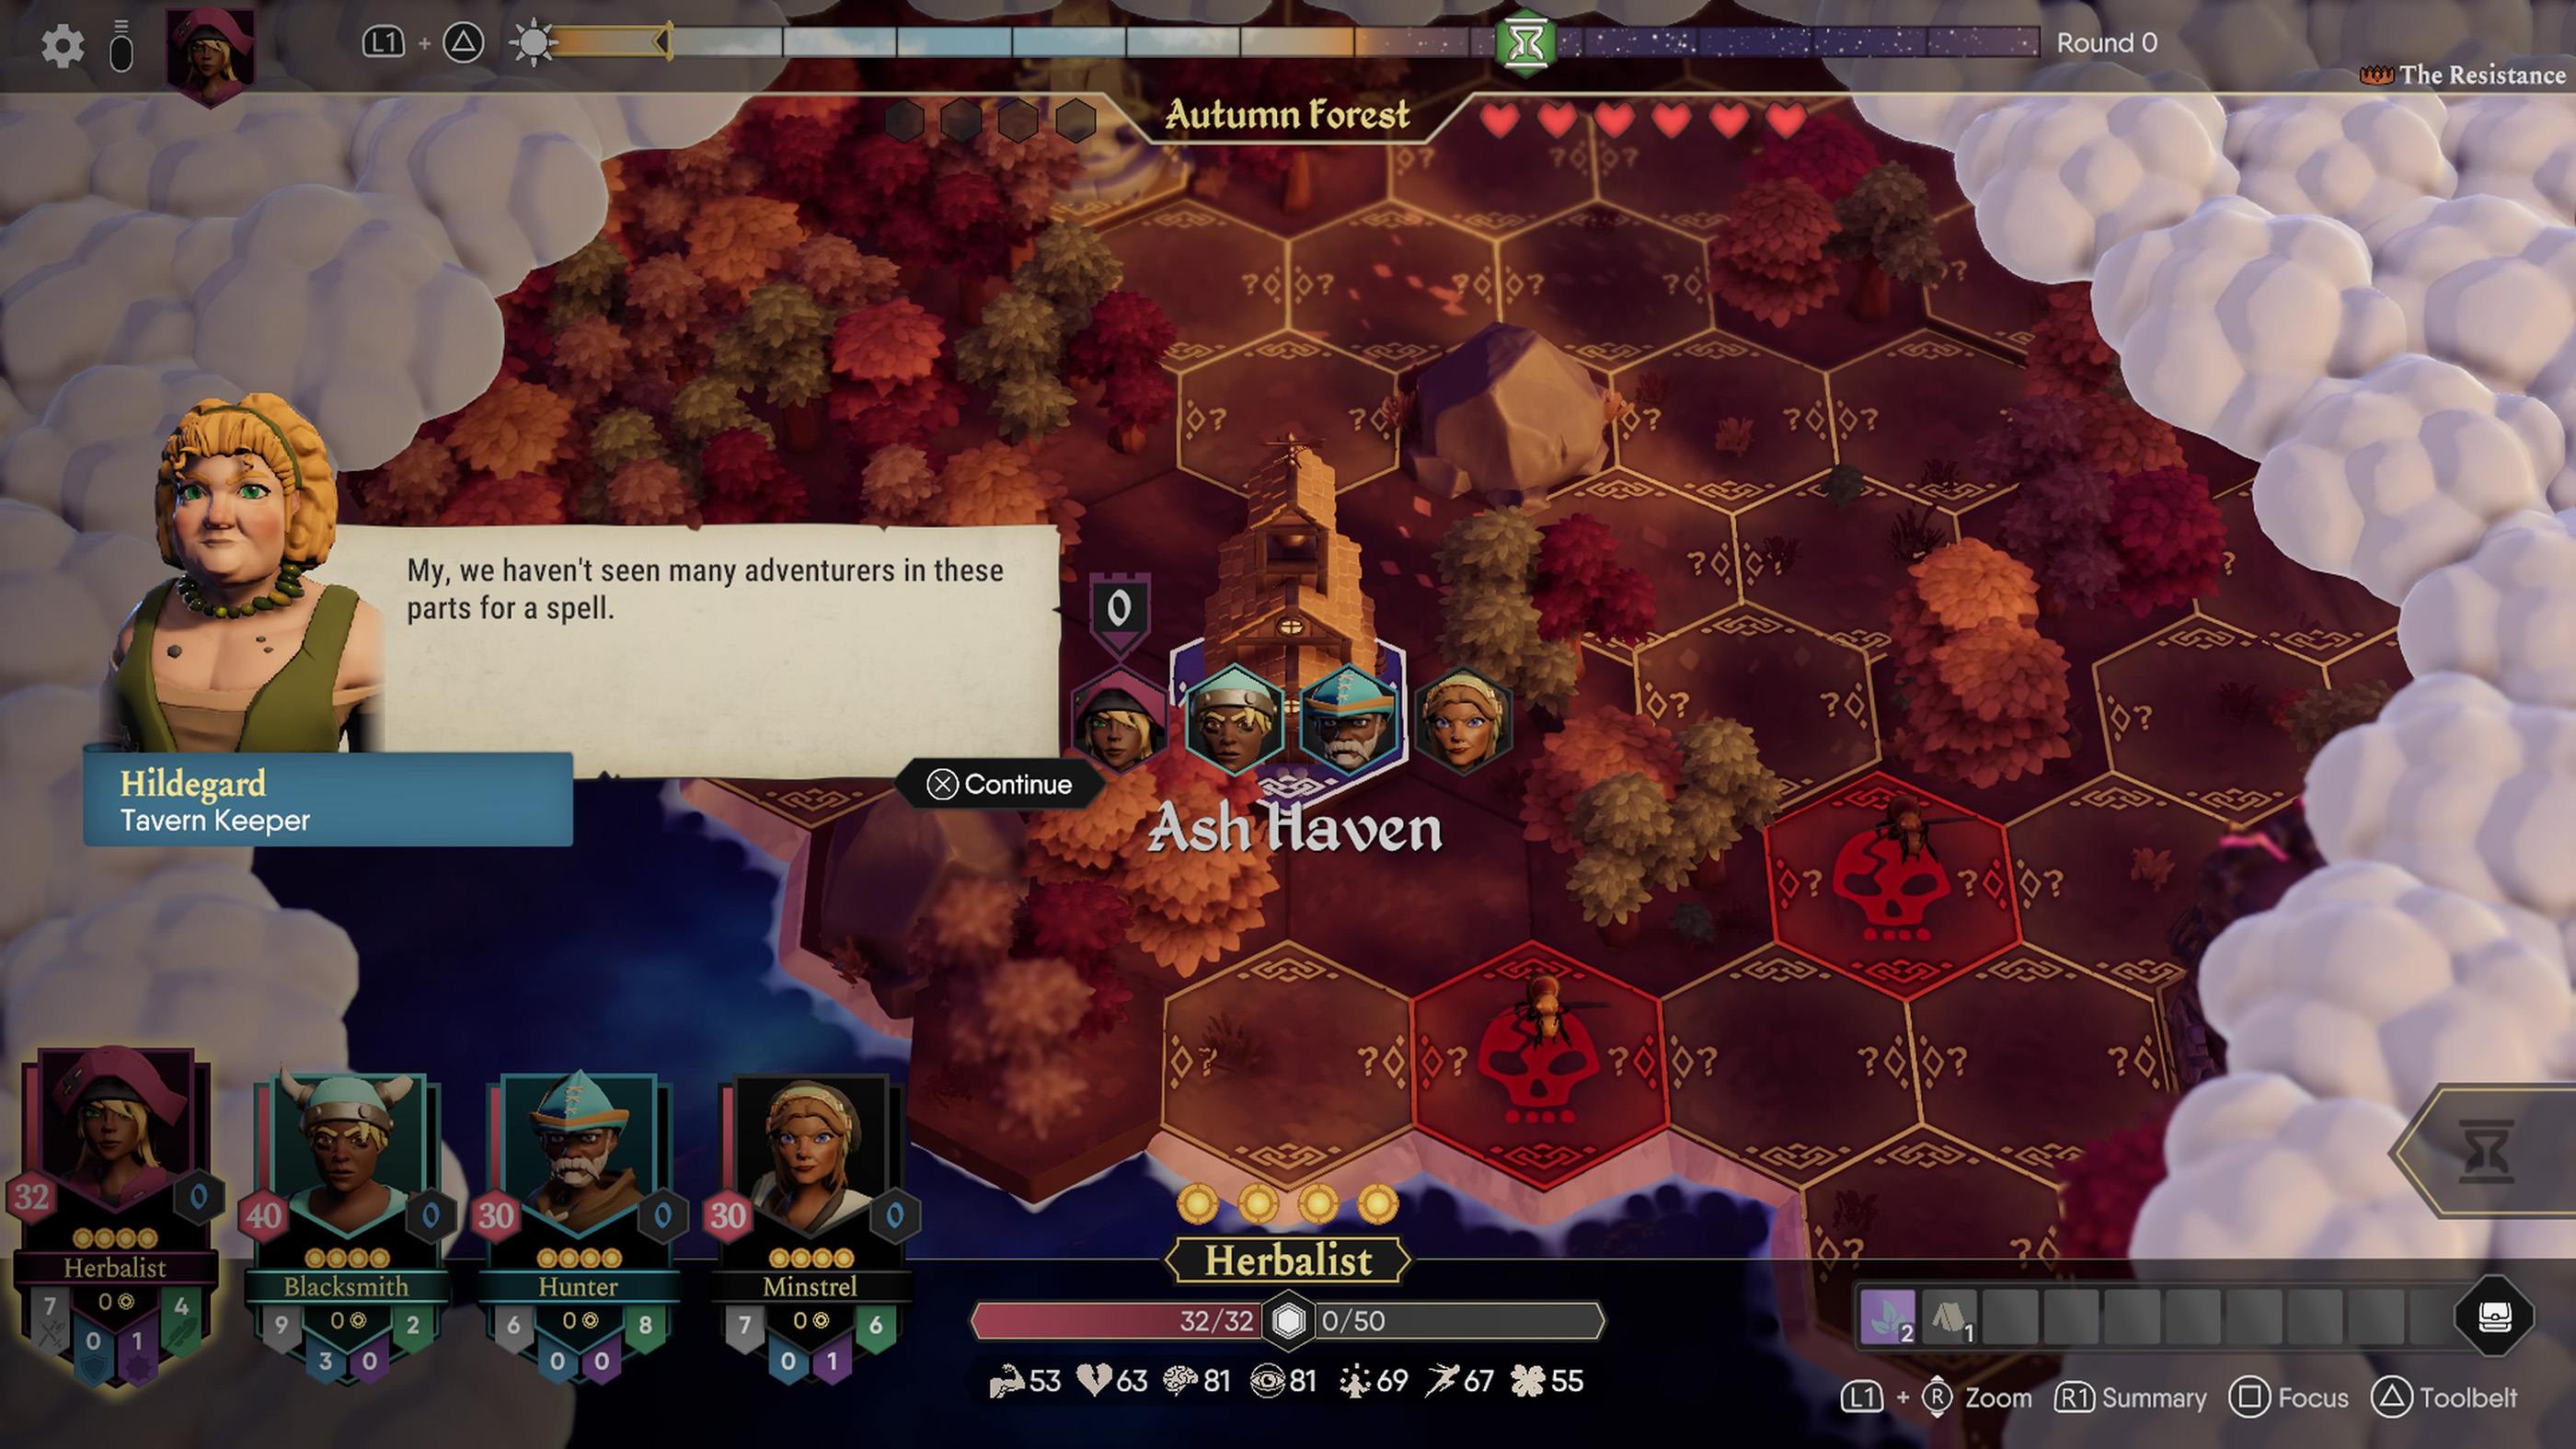
Plan Around the Timeline
Campaign pressure advances while the party explores. Main objectives, dangerous events and escalating threats should influence every detour.
Handle Urgent Objectives First
An optional cave is rarely worth allowing a major penalty to enter the timeline.
Combine Tasks Geographically
Visit a town, side quest and sanctum during one route instead of repeatedly crossing the same region.
Do Not Overlevel Through Aimless Wandering
Extra battles consume health, Focus and equipment durability while the larger campaign continues advancing.
Keep a Travel Reserve
Preserve enough healing and Focus to survive an unexpected encounter on the way back to the objective.
Use Towns as Strategic Hubs
Towns provide more than shops. Their services can determine whether the next dungeon is manageable.
Before leaving a town:
- Heal injured heroes.
- Restore Focus where affordable.
- Remove dangerous conditions.
- Upgrade weak equipment.
- Sell unused items.
- Restock healing.
- Check available quests.
Shop for the Weakest Slot
Replacing a terrible piece of armour may improve survival more than upgrading the party's already strongest weapon.
Keep Gold for Services
Do not spend every coin at the equipment screen. Healing and cleansing may be essential before the next objective.
Compare the Whole Party
Cycle through all four heroes before deciding who receives an expensive item.
Buy Useful Gear Instead of Waiting for Perfect Loot
Roguelite randomness means the ideal weapon may never appear. Affordable, reliable improvements help the party survive long enough to find better equipment.
Upgrade Large Weaknesses First
A hero using an underlevelled weapon or starting armour should receive priority over a small improvement to an already powerful character.
Do Not Empty the Treasury
Maintain enough gold for healing, travel and emergency items.
Sell Items with No Clear Role
Keep useful alternatives, but convert genuinely redundant equipment into resources the party can use immediately.
Prepare Before Entering a Dungeon
Dungeons test resource management across several encounters. The party may not be able to return to town between rooms.
Before entering, check:
- Health and Focus.
- Healing supplies.
- Status-removal items.
- Physical and magical damage options.
- Battle Grid positions.
- Equipment durability or penalties.
- Whether every hero is close enough to join.
Do Not Enter Merely Because the Level Matches
A properly equipped and supplied party is more important than the displayed level alone.
Preserve Resources in Early Rooms
Use reliable basic attacks against weak groups rather than spending every Focus point before the final encounter.
Rearrange Between Encounters
Change equipment or formation when the dungeon introduces a different enemy type.
Use Camps and Rest Opportunities Efficiently
Rest resources are strongest when several heroes benefit simultaneously.
Gather Before Camping
When practical, move injured party members close enough to share the recovery opportunity.
Do Not Camp for Minor Damage
Save limited rest supplies for situations where they restore substantial health, Focus or both.
Camp Before the Dangerous Room
Do not carry a nearly exhausted party into a boss simply because one more room remains.
Use Sanctums and Permanent Protection Wisely
Sanctums can provide powerful bonuses and protection against a fatal mistake.
Match the Bonus to the Hero
Give offensive benefits to heroes who can exploit them and defensive protection to characters most likely to be exposed.
Do Not Waste Protection
A sanctum's safety is valuable. Avoid unnecessary encounters merely because a hero currently has a second chance.
Plan Which Hero Visits
When several heroes could claim a sanctum, choose according to the complete party strategy rather than whoever happens to be nearest.
Use Landboats to Control Travel Time
Landboats and other transport options can move the party efficiently and help reduce wasted turns across large regions.
Buy Transport When the Map Justifies It
A vehicle provides greater value when objectives are widely separated and the party expects to revisit central locations.
Keep Everyone Near the Vehicle
A fast transport option loses much of its value when one hero must spend several turns catching up.
Inspect the Route First
Speeding into unrevealed terrain can place the party beside an enemy or beyond a safe stopping point.
Protect the Investment
Avoid careless routes and hazards that could damage or strand an expensive vehicle.
Use Pets to Fill a Missing Role
Pets add another layer of party customisation. Rather than selecting one only for appearance, consider how its contribution fits the group.
A useful pet may support:
- Additional damage.
- Defence or durability.
- Utility.
- Resource efficiency.
- A class weakness.
Level Pets Deliberately
Use available pet progression resources on companions that contribute consistently to the active party.
Do Not Duplicate an Existing Strength
A party already overflowing with damage may benefit more from defensive or utility support.
Evaluate the Whole Build
A pet's value should be considered alongside the hero's class, equipment, grid position and intended role.
Use Inventory Sorting and Tags
A long campaign produces a large amount of loot. Sorting and tagging reduce the chance of selling a useful alternative or carrying obvious clutter.
Tag Before Selling in Bulk
Review secondary weapons, status-immunity equipment and quest-related items before confirming a large sale.
Organise by Role
Keep track of:
- Primary weapons.
- Backup damage types.
- Healing supplies.
- Status removal.
- Exploration equipment.
- Items intended for sale.
Do Not Carry Everything Forever
Unused loot represents gold that could become healing, services or an immediate upgrade.
Coordinate Gold in Co-op
Gold belongs to individual heroes, but the party succeeds or fails together.
Fund Important Purchases
Transfer or share resources when one player finds a major weapon upgrade, critical healing or transport that benefits everyone.
Do Not Treat Loot as Ownership
The character who finds an item is not necessarily the best person to use it.
Discuss Expensive Decisions
Before spending most of the party's combined resources, confirm that no one needs urgent healing or equipment.
Coordinate Turns in Multiplayer
Co-op is most effective when players describe the purpose of their action rather than announcing it after confirmation.
Before acting, communicate:
- The intended target.
- Whether Focus will be spent.
- Which status effect is being prepared.
- Who will finish the enemy.
- Whether healing is needed first.
- Where the hero will move afterward.
Do Not Duplicate Support Actions
Two players may heal the same hero or apply overlapping effects when no one states their plan.
Use Nudge Politely
A player may be reading an item card or calculating a roll. Nudge only when the turn appears genuinely unattended.
Let the Specialist Decide
The player controlling a hero generally understands that character's available equipment and Focus better than the rest of the group.
Share Items According to Speed and Role
The best person to carry an item is not always the person who needs its effect.
Give Emergency Healing to Fast Heroes
A fast character may act early enough to save an ally before enemies take their turns.
Spread Revival and Cleansing
Avoid placing every emergency item on the same hero.
Put Utility on the Hero Who Can Use It Safely
A frontliner under constant pressure may have fewer good opportunities to spend a turn on an item than a protected support character.
Inspect Unknown Encounters
Not every map event is a straightforward fight. Press R3 and read the available details before entering.
Consider:
- The recommended level.
- The statistic likely to be tested.
- The possible reward.
- The failure penalty.
- Whether the complete party can participate.
- How the encounter affects the current timeline.
Use the Best Hero for the Test
Choose the character whose relevant statistic provides the highest chance rather than sending the closest hero automatically.
Spend Focus on Lasting Rewards
A permanent benefit, important quest result or powerful item may justify more Focus than a small random reward.
Do Not Fight Every Enemy
Combat provides experience and loot, but also consumes time, health, Focus and items.
Fight for a Reason
Good reasons include:
- Clearing a route.
- Completing a quest.
- Reaching an important level before a dungeon.
- Obtaining a valuable reward.
- Removing a threat near a town or objective.
Avoid Low-Value Attrition
An irrelevant enemy several levels below the party may not justify the campaign time and resource cost.
Do Not Chase Loot into Disaster
A treasure or encounter is not worthwhile when it causes the party to miss an urgent objective.
Manage Experience Across the Party
A severely underlevelled hero becomes vulnerable and may contribute unreliable rolls.
Keep Levels Reasonably Close
Avoid allowing one mobile character to claim every solo encounter while the rest of the group falls behind.
Help Weak Heroes Secure Safe Progress
Include them in manageable fights and provide equipment that improves their reliability.
Do Not Overfeed the Strongest Character
One overpowered hero cannot always protect three companions who are defeated by a single area attack.
Prepare for Equipment Breakage and Loss
A party relying on one exceptional item is vulnerable when that equipment becomes unavailable.
Carry a Functional Backup
The secondary weapon does not need to be equally powerful, but it should allow the hero to remain useful.
Do Not Sell Every Old Piece Immediately
Keep alternatives with valuable damage types, immunities or grid patterns.
Spread Essential Functions
Do not place all healing, area damage or control on one fragile item or character.
Adjust the Difficulty Without Shame
For The King II is intentionally punishing. Random rolls, campaign pressure and resource attrition can combine into difficult situations even after good decisions.
Learn on a Forgiving Setting
Understanding Focus, grid positioning and item statistics is more valuable than repeatedly restarting before those systems become clear.
Increase Difficulty After Building Good Habits
Harder settings reward players who already know how to prepare dungeons, manage timelines and coordinate party roles.
A Failed Campaign Still Unlocks Knowledge
Roguelite progression means learning enemy patterns, quests and class interactions improves the next attempt.
Common Beginner Mistakes
Equipping the Highest-Damage Weapon Automatically
Check the required statistic and roll slots before comparing damage.
Spending Focus on Every Attack
Preserve it for important rolls and emergencies.
Keeping Every Hero in One Row
Area attacks can punish clustered formations.
Ignoring the Initiative Timeline
Turn order determines whether healing, control or damage is urgent.
Carrying All Healing on One Character
Spread recovery across the party.
Entering Dungeons with Missing Focus
Prepare before committing to several consecutive encounters.
Splitting Up Before a Quest Battle
Reunite before entering a mandatory fight.
Saving Gold Forever
Affordable early upgrades can prevent much larger resource losses.
Using Only Physical or Magical Damage
Prepare both so the party can exploit different defences.
Ignoring Grid Reach
A weapon may not function from the hero's current row.
Fighting Every Map Enemy
Low-value encounters consume campaign time and supplies.
Choosing Actions Before Inspecting
Enemy immunities and skill patterns can completely change the correct decision.
A Reliable Overworld Routine
- Check the campaign timeline.
- Identify the next urgent objective.
- Inspect nearby towns, quests and enemies.
- Place a marker on the party's destination.
- Decide whether the party should remain together.
- Move the slowest or most restricted hero first when appropriate.
- Use Focus only when movement changes the strategic outcome.
- Shop and restore resources before leaving the final town.
- Reunite before a dungeon or required battle.
- Review every hero through the Party Summary.
A Reliable Combat Routine
- Inspect enemy armour, resistance and immunities.
- Read the initiative timeline.
- Identify healers, summoners and area attackers.
- Check the Battle Grid target patterns.
- Move fragile heroes away from dangerous lanes.
- Apply protection or control where it prevents the most damage.
- Use Focus on the action that must succeed.
- Concentrate damage to remove an enemy turn.
- Heal before the threatened hero can be defeated.
- Reassess formation whenever enemies move or summon allies.
A Reliable Dungeon Checklist
- The complete party is present.
- Every hero has a suitable primary weapon.
- Physical and magical damage are available.
- Healing is distributed across several heroes.
- Status-removal supplies are available.
- Focus has been restored.
- Fragile heroes begin in protected grid positions.
- Backup weapons have been retained.
- Unnecessary inventory has been sold or sorted.
- The party is not ignoring an urgent timeline objective.
Frequently Asked Questions
What is the best party in For The King II?
There is no single best combination, but a strong party usually includes durable frontline defence, physical damage, magical damage and support or control.
Should the party use four different statistics?
A varied stat spread helps the group use more loot and succeed at different overworld tests without excessive competition for equipment.
What should I spend Focus on?
Use it for decisive attacks, dangerous quest checks, important status effects and movement that prevents a serious strategic problem.
Should I use Focus on movement?
Yes, when the additional movement reunites the party, reaches safety or completes an urgent objective. Avoid spending it only to reveal one unimportant hex.
How does the Battle Grid work?
Heroes and enemies occupy rows and columns. Weapon reach, protection and area attacks depend on those positions.
Who should stand in the front row?
Durable heroes using shields, short-range weapons or protection skills generally belong in front.
Who should stand in the back row?
Fragile ranged, magical and support characters benefit from the back when their abilities retain sufficient reach.
Should I spread the party out?
Spread against row, column or adjacency attacks. Group only when a defensive or support benefit justifies it.
Is higher weapon damage always better?
No. The matching statistic, number of roll slots, damage type, reach and additional effects can be more important.
Why does my powerful weapon keep missing?
The character may have a low value in the weapon's required statistic or the attack may contain too many difficult roll slots.
Should I keep old weapons?
Keep useful backups that provide another damage type, range pattern or status effect.
How much healing should I carry?
Carry enough for several encounters and distribute it across multiple heroes rather than placing everything on one character.
Should I split the party?
Split only for a clear and nearby benefit. Reunite before major encounters, dungeons and urgent objectives.
What should I buy first?
Replace the party's weakest and least reliable equipment, then reserve gold for healing, Focus restoration and other services.
How should I prepare for a dungeon?
Restore health and Focus, distribute consumables, prepare both damage types and confirm that every hero can participate.
Are pets useful?
Yes. Pets add combat or utility support and should be selected and developed according to the role the party needs.
How do I decide which enemy to attack?
Prioritise enemies acting soon, healers, summoners, support units and targets that can be defeated before their next turn.
Should I fight every enemy on the map?
No. Fight when the experience, loot or cleared route justifies the health, time and resource cost.
How does co-op loot work best?
Give each item to the hero who uses its statistics and effects most effectively rather than automatically keeping what your character finds.
What is the best beginner tip?
Inspect everything. Read the required statistic, roll slots, target pattern and enemy defences before confirming an action.
Final Tips
Success in For The King II comes from turning uncertain rolls into calculated risks. Equip weapons that match each hero's statistics, spend Focus where failure would genuinely hurt and arrange the Battle Grid so enemies cannot exploit the whole party with one attack.
The overworld deserves the same discipline. Follow the campaign timeline, combine nearby objectives, enter towns with a shopping plan and reunite before important fights. A treasure is not valuable when obtaining it leaves the group injured, late and separated.
Most importantly, build for the party rather than the individual. Share gold, distribute healing, cover both damage types and give every hero a role. Fahrul rarely rewards four adventurers acting alone, even when they happen to be standing on the same battlefield.
See our For The King II Controls Guide for the complete PlayStation, Xbox and PC controller layout.
Comments
No comments yet. Be the first to share your thoughts!