PRAGMATA is easiest to misunderstand when approached as a straightforward third-person shooter. Hugh carries the guns, but Diana creates the openings that make those guns effective. Winning consistently means solving a small routing puzzle while reading enemy attacks, controlling space, choosing a weapon, and preserving limited resources.
That sounds overwhelming, particularly during the opening hours. The trick is not to perform every action faster. It is to arrange the fight so that you have fewer urgent problems at the same time.
These spoiler-light PRAGMATA tips cover real-time hacking, armor openings, weapon classes, Repair Cartridges, scanning, upgrades, Shelter preparation, environmental puzzles, boss encounters, and the habits that make Hugh and Diana work as one unit.
Think of Hacking as Your Real Reload
In an ordinary shooter, firing stops when the magazine is empty. In PRAGMATA, meaningful damage often stops when an enemy's armor closes.
Treat every successful hack as the beginning of a damage window. Prepare your position and weapon before completing the final grid input so you can use the entire opening rather than spending its first seconds swapping equipment or finding the target.
Do Not Empty Ammunition into Closed Armor
Armored machines are intentionally resistant to Hugh's gunfire. A few shots may be useful for breaking a separate barrier or interrupting a specific behavior, but sustained fire against closed plating usually wastes time and limited ammunition.
Hack first, then shoot. This is the single most important combat rule in the game.
Begin with the Shortest Valid Hack
Optional grid nodes can improve a hack, but taking every bonus on every enemy is inefficient. When learning a new encounter, choose the shortest legal route to the destination.
Once you understand the enemy's timing and have created safe space, begin incorporating valuable bonus nodes. Reliability comes before optimization.
Read the Grid Before Pressing Anything
Spend a brief moment identifying the start, goal, directional restrictions, and useful optional nodes. One second of planning is faster than entering three moves and discovering that the route cannot be completed.
Look for the final approach to the destination first. Working backward from the goal can make a complicated grid easier to understand.
Think in Directions, Not Button Names
The four face buttons physically match four directions. This is especially important when moving between PlayStation, Xbox, Nintendo, and PC controllers, where the letters and symbols occupy different positions.
Train yourself to see the grid and press top, bottom, left, or right. Once this mental connection forms, hacking becomes much faster.
Use Simple Finger Patterns
Long routes become easier when divided into small shapes. A sequence such as up, right, right, down is easier to remember as “around the corner” than as four unrelated prompts.
Recognize straight lines, stair steps, loops, and U-shaped routes. Your thumb can then execute the shape while your attention returns to the enemy.
Do Not Stare Only at Diana's Grid
The hacking display demands attention, but Hugh remains physically present in the arena. Watch for incoming missiles, warning lines, enemy lunges, floor hazards, and movement at the edge of the screen.
Use short glances: read part of the route, enter those directions, check the battlefield, and then finish the route.
Keep Hugh Moving During Every Difficult Hack
Standing still gives enemies a predictable target. Circle the room, strafe around the machine, or move toward cover while entering Diana's commands.
Broad lateral movement is usually better than backing into an unexplored corner. It keeps the target visible and reduces the chance of becoming trapped.
Dodge Without Abandoning the Hack
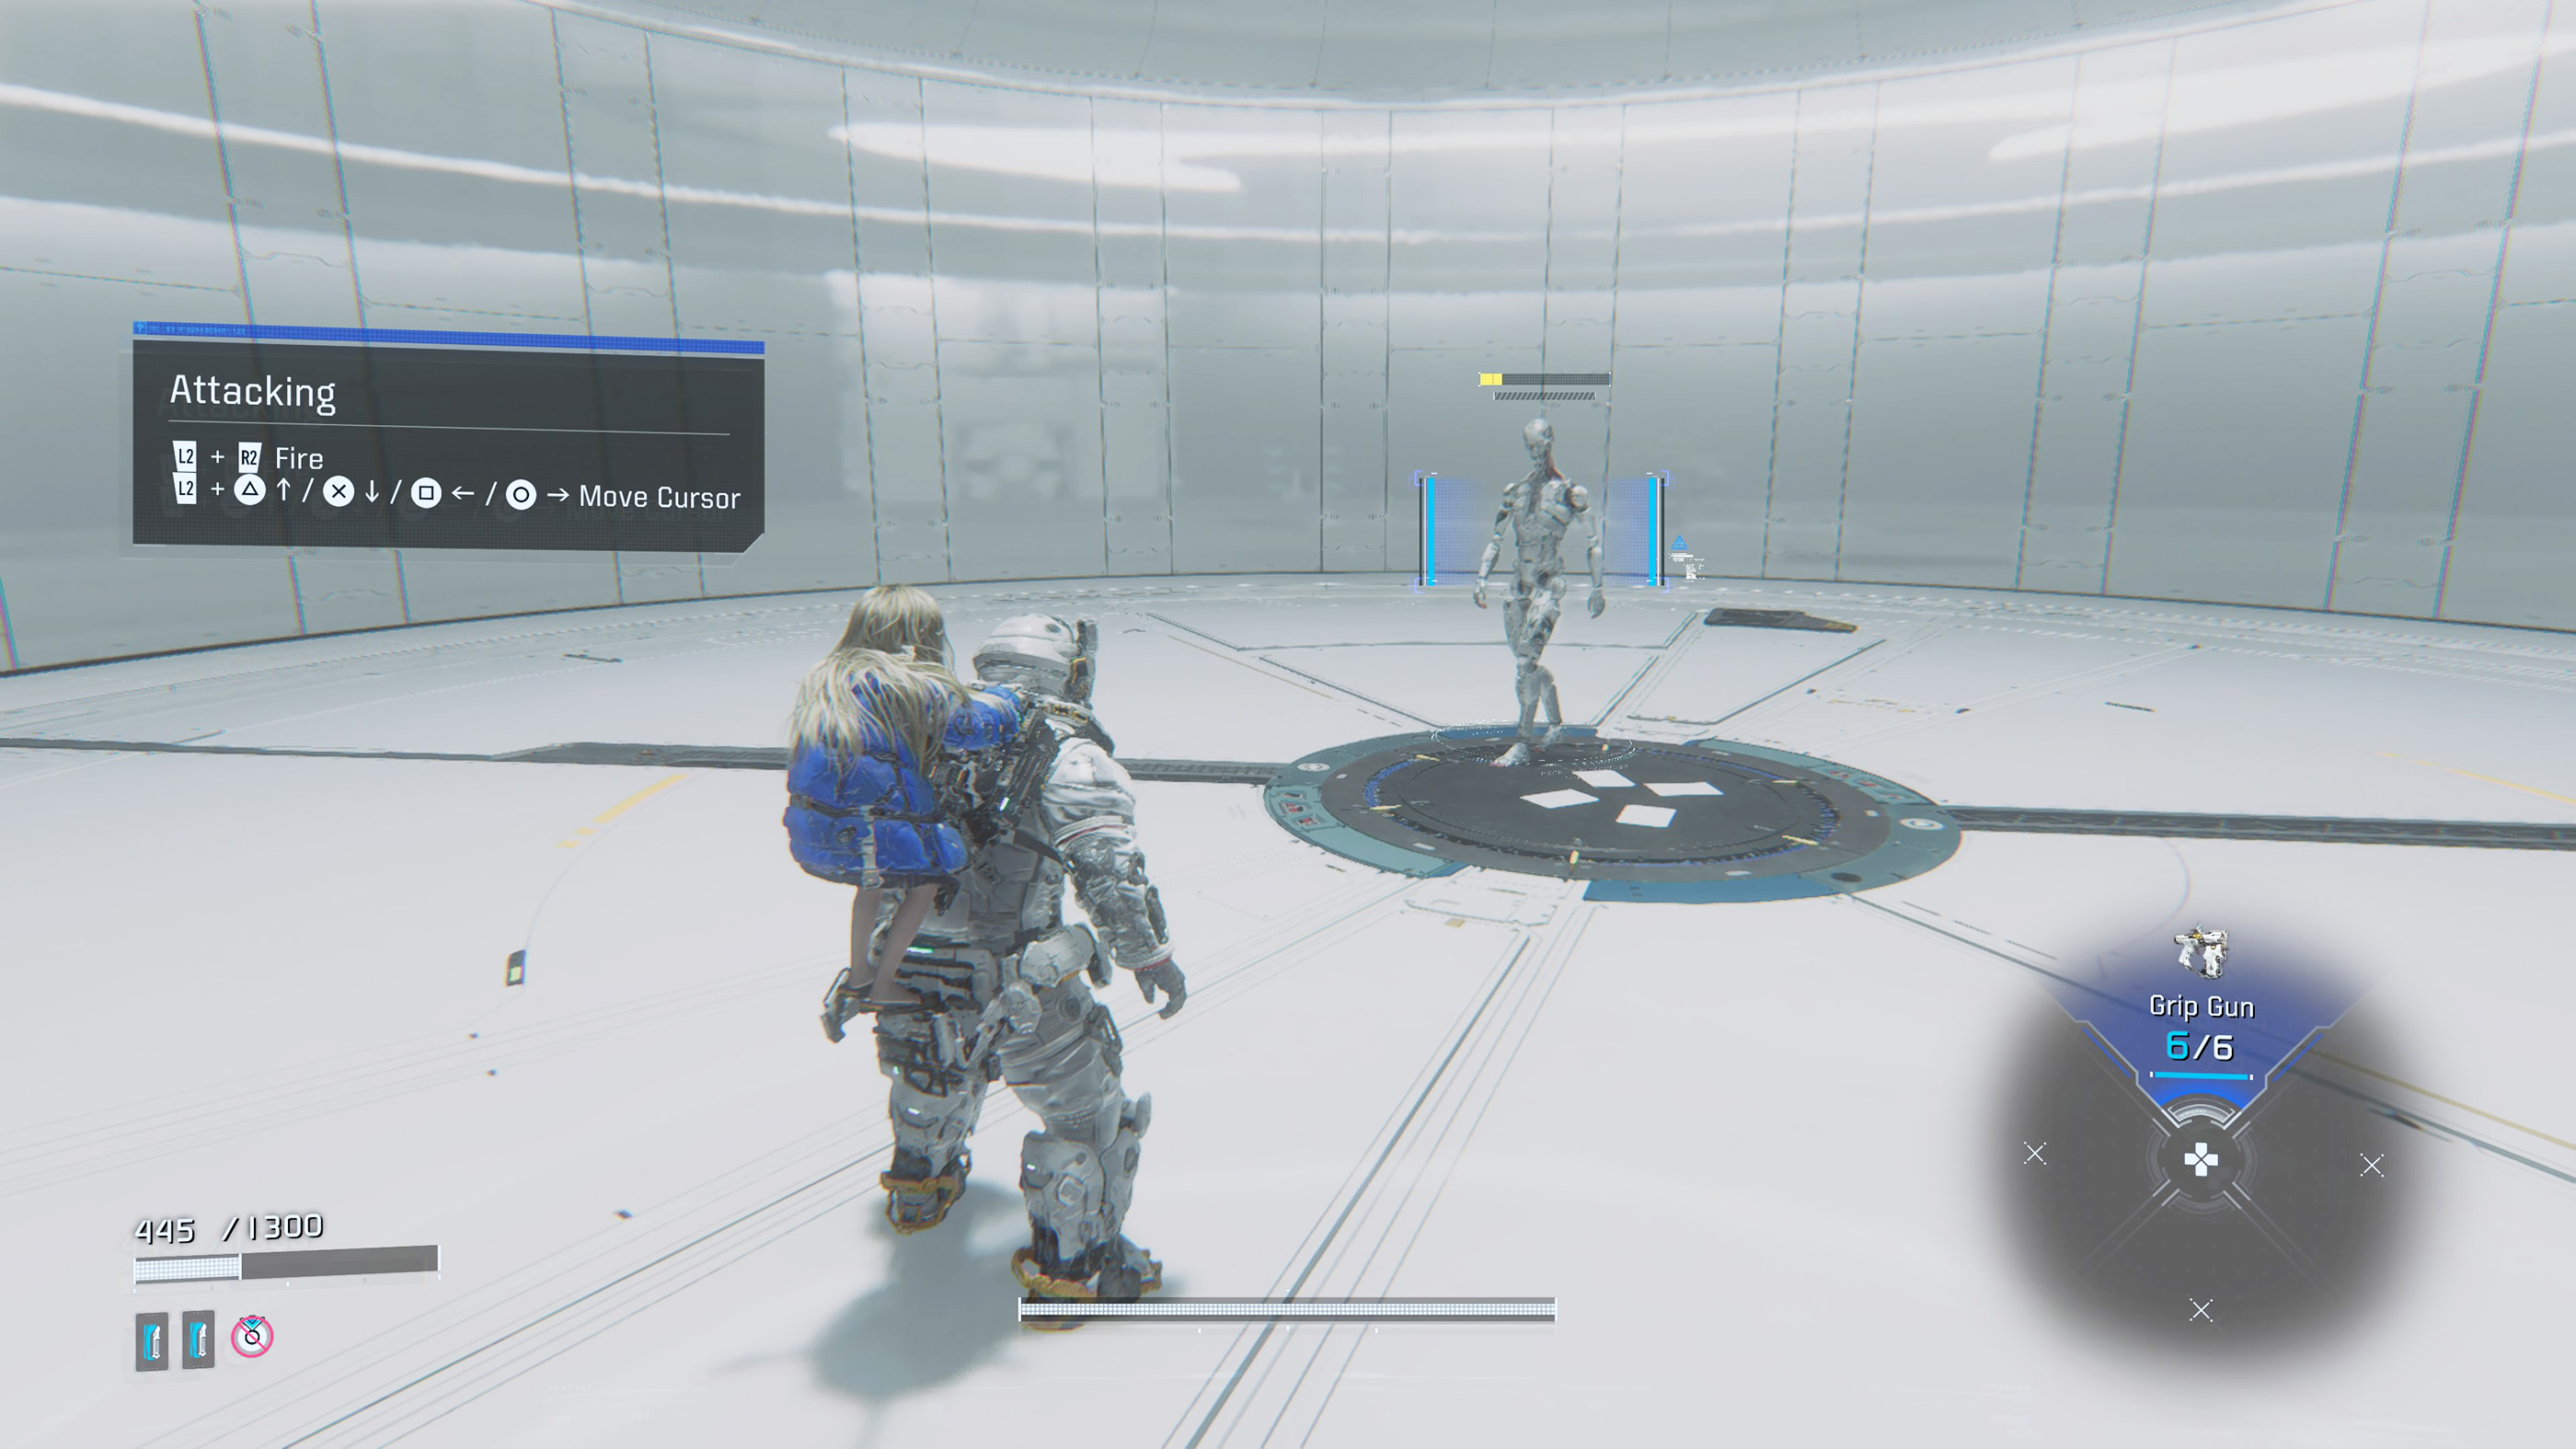
Hugh's jet dodge is designed to work during the hacking process. When an attack approaches, dodge first and continue the route afterward.
Do not rush the remaining inputs merely because danger is coming. A clean dodge followed by a correct route is faster than failing the hack and taking damage.
Cancel a Hack When the Battlefield Changes
A route that was safe two seconds ago may become dangerous when another robot enters, a missile is launched, or the floor becomes hazardous.
Cancel, reposition, and begin again. PRAGMATA rewards composure, not stubborn commitment to a bad situation.
Break Red Barriers Before Trying to Hack
Some enemies are protected by a red shield-like defense that prevents Diana from hacking them. Use Hugh's weapons or another appropriate attack to destroy the barrier first.
Watch the enemy's visual state. If the hacking interface refuses to engage, do not keep pressing directional buttons. Deal with the outer protection, then begin the grid.
Finish the Hack with Your Weapon Ready
Select the intended weapon before entering the last grid move. When the armor opens, immediately place shots into the exposed target.
This matters most with high-damage Attack Units and short openings. Changing weapons after completion can consume a large part of the opportunity Diana created.
Use the Primary Unit for Routine Work
The Primary Unit is dependable because its energy recharges. Use it against common enemies, minor weak points, and targets that are already close to defeat.
Allow its energy to recover between bursts instead of holding the trigger until it is drained. Controlled firing produces more consistent pressure.
Save Attack Units for Open Targets
Attack Units are intended to convert a successful hack into heavy damage. Their ammunition is too valuable to spend carelessly against closed armor or small enemies that the Primary Unit can handle.
Use them against bosses, elites, exposed cores, or a dangerous machine that must be removed immediately.
Use Tactical Units to Buy Hacking Time
A Tactical Unit is not merely an alternative source of damage. Traps, restraints, explosives, and control effects can keep an enemy predictable while Diana solves a longer route.
Deploy the tactical effect first, begin hacking second, and switch to an offensive weapon before completing the route.
Use Defense Units Before You Are Cornered
Defensive tools are strongest when used proactively. A decoy, shield, or displacement effect can prevent several enemies from focusing on Hugh at once.
Waiting until Hugh is nearly defeated may leave too little space or time to deploy the tool effectively.
Give Every D-Pad Direction a Permanent Role
Place the same weapon category in the same slot whenever possible. For example:
- Up: Primary Unit.
- Right: Attack Unit.
- Left: Tactical Unit.
- Down: Defense Unit.
The exact arrangement does not matter. What matters is being able to select a role without checking the HUD.
Replace Nearly Empty Disposable Weapons
Most weapons outside the Primary category are finite tools. When a replacement appears, compare it with the remaining usefulness of your current weapon.
A fresh, slightly less powerful weapon may be more valuable than an excellent weapon with one impractical shot remaining.
Do Not Save Every Special Weapon for a Future Boss
Limited ammunition encourages hoarding, but refusing to use strong tools creates unnecessary damage and Repair Cartridge consumption.
Spend a weapon when it prevents a dangerous encounter from escalating. You will find and manufacture additional units as the adventure continues.
Prioritize the Most Disruptive Enemy
The closest robot is not always the most dangerous. A distant missile unit or hacking-disruption enemy can ruin every attempt to open another target.
Before attacking, identify which machine interferes most with your ability to multitask. Remove that enemy first, even when a weaker target is standing nearby.
Separate Fast Enemies from Slow Enemies
Retreat through open space and allow quick machines to move ahead of heavier units. Fighting them in separate waves reduces visual clutter and makes Diana's grid safer to use.
Do not retreat blindly into an uncleared room. Circle through terrain you have already inspected.
Use Doorways and Structures to Limit Attack Angles
Large open arenas provide movement space, but they also allow ranged enemies to attack from every direction. A doorway, pillar, machine, or wall can temporarily block part of the battlefield.
Use cover to control line of sight, not as a permanent hiding place. Reposition when enemies begin surrounding it.
Watch the Floor as Carefully as the Enemy
Hugh may dodge a direct attack and still land in an environmental hazard. Before dashing, glance toward the destination rather than reacting only to the source of danger.
Sideways dodges are generally safer when the area behind Hugh is unknown.
Hover Only When It Solves a Specific Problem
Hovering can cross gaps and avoid certain floor-level threats, but remaining airborne may make Hugh easier to track or reduce his control near obstacles.
Use it deliberately for traversal, vertical repositioning, or a clearly telegraphed ground hazard. Do not treat it as a universal defense.
Use Overdrive on Difficult Groups, Not Defeated Battles
A powerful ability provides little value when activated after most threats are already gone. Use Overdrive early enough to control the encounter's hardest phase.
Bosses may also present specific moments when an extended opening or immobilization is especially valuable. Learn the pattern before committing the ability.
Repair Earlier Than You Think
Repair Cartridges require a safe activation window. Waiting until Hugh is one hit from defeat creates pressure to heal in a terrible position.
Repair once health is low enough that the next mistake would become dangerous, not only when the gauge is nearly empty.
Create Safety Before Holding the Repair Button
Move behind cover, disable an enemy, deploy a defensive weapon, or wait for a long recovery animation. Then hold the repair input until the action completes.
Do not repeatedly begin and interrupt the animation. That wastes valuable openings without restoring Hugh.
Increase Repair Capacity When Possible
Additional healing capacity improves every mission and gives you more opportunities to learn difficult bosses. It is one of the most broadly useful forms of progression.
Still, extra cartridges do not replace good positioning. Treat them as protection against mistakes rather than permission to absorb avoidable attacks.
Use Checkpoints with a Plan
Escape Hatches provide access to the Shelter and function as important progress points. Activating one is almost always worthwhile, but returning to the hub may alter the state of nearby enemies or temporary equipment.
Before leaving, decide whether you have finished exploring the immediate area and whether your current limited-use weapons are worth consuming first.
Visit the Firmware Updater Early and Often
The Firmware Updater provides lasting improvements for Hugh and Diana. Useful upgrades include greater suit durability, stronger Primary Unit damage, and longer enemy-open duration after a successful hack.
These improvements strengthen the basic loop used in every battle, making them more dependable than a highly specialized upgrade you rarely activate.
Extend Diana's Open Duration
A longer vulnerability window gives you more time to switch weapons, aim at a precise weak point, avoid an attack, or recover from an imperfect position.
This is particularly valuable for players who can complete the hacking grid reliably but struggle to convert the result into enough damage.
Improve the Primary Unit
Because the Primary Unit is always useful and does not depend on disposable ammunition, its upgrades provide consistent value across the entire game.
A stronger Primary Unit also makes it easier to preserve Attack Units for bosses and emergencies.
Do Not Neglect Hugh's Maximum Health
Damage is attractive, but additional health gives you more time to understand new enemy behaviors and recover from a missed dodge while hacking.
Balance offensive improvements with enough durability to survive the areas you are currently exploring.
Use the Unit Printer to Expand Options
The Unit Printer makes additional weapons available for future loadouts. Prioritize tools that fill a missing tactical role rather than purchasing several weapons that solve the same problem.
A balanced selection should include reliable damage, burst damage, crowd control, and a defensive answer.
Test New Equipment in Training
A weapon description cannot fully explain timing, range, projectile behavior, or how naturally the unit fits into your hacking routine.
Use available training challenges or safer encounters to learn a new tool before carrying it into an important mission.
Adjust the Loadout for the Destination
The strongest general loadout is not automatically the best for every mission. A narrow area with several fast enemies may reward control and defense, while an elite encounter may favor concentrated damage.
Check the selected destination and known enemy types before leaving the Shelter.
Scan Every New Room Once
A single scan after entering an area can reveal useful objects, routes, pickups, and interactable technology. It also reduces the chance of overlooking something against the facility's pale, reflective surfaces.
After scanning, examine the room normally. Constant scanning can clutter the interface and make navigation less natural.
Look Above and Below the Main Route
Hugh's jump and hover capabilities allow PRAGMATA to hide routes vertically. Check upper walkways, broken platforms, ledges, maintenance spaces, and lower sections beneath bridges.
A path that appears decorative may become reachable from a nearby elevated object.
Investigate Rooms That Do Not Advance the Objective
Optional rooms are natural places for resources, upgrade material, collectibles, terminals, and environmental storytelling.
When the objective marker points one way, briefly check the opposite direction before continuing.
Listen for Machines and Pickups
Useful objects and hostile machines may produce distinctive mechanical or electronic sounds before they become clearly visible.
Headphones help separate an object behind a wall from one above or below Hugh's current position.
Read the Environment Before Entering an Arena
When a room looks designed for combat, inspect its pillars, ledges, cover, hazards, and weapon pickups before moving into the center.
Knowing where to retreat and where replacement units are located prevents desperate searching after the battle begins.
Do Not Collect Every Weapon Immediately
A weapon pickup can serve as an emergency replacement during the fight. Taking it before your current unit is depleted may waste some of the available ammunition.
Remember its location and return when the equipped weapon is nearly exhausted, provided the arena remains accessible.
Use Environmental Hacking Outside Combat
Diana's abilities are not limited to enemy armor. Hacking can operate devices, solve facility puzzles, disable threats, and alter machinery.
When progress appears blocked, scan the surroundings and look for connected terminals or machines rather than searching only for a physical door switch.
Study a Boss Before Spending Rare Ammunition
Use the Primary Unit and short hacking routes during the opening attempts to learn the boss's movement, defenses, and vulnerable phases.
Commit valuable Attack Units once you can reliably create and recognize the best damage window.
Learn Which Attacks Interrupt Hacking
Some boss actions are easy to avoid while continuing a route; others demand your full attention. Identify which warnings mean “keep moving” and which mean “cancel immediately.”
Trying to finish one extra grid input during a major attack is a common source of unnecessary damage.
Prepare the Grid but Delay the Final Input
When the route permits it, stop one move before completion and wait for the boss to finish an attack or move into a favorable position.
Enter the final direction when you are ready to fire. This technique synchronizes Diana's opening with Hugh's best opportunity.
Match the Weapon to the Weak Point
Some openings favor close burst damage, while others reward a precise or sustained weapon. Do not equip a powerful unit merely because its damage number is high.
Consider range, duration of the opening, size of the weak point, and the boss's likely movement.
Use Defensive Tools to Protect a Long Hack
More complicated boss grids may require several seconds of attention. A defensive or tactical unit can create the time needed to complete them cleanly.
Deploy the protection before beginning the grid rather than trying to activate it midway through a crisis.
Repair During Recovery Animations
Bosses often pause after major attacks. These moments may be safer for repairing than immediately attacking, especially when Hugh is one mistake from defeat.
Survival preserves the entire attempt; one additional damage burst may not.
Change the Difficulty Before Frustration Replaces Learning
The central challenge is multitasking. When the combined pressure prevents you from understanding the mechanics, temporarily adjusting difficulty or assistance options can create room to learn the grid and enemy patterns.
You can always return to a more demanding setting once the controls become automatic.
Adjust Aim Assistance Separately from Hacking
Difficulty aiming and difficulty hacking are different problems. Increasing aim assistance can reduce the shooting workload while preserving the real-time grid challenge.
Experiment with camera speed and aim sensitivity until you can track an exposed target without large corrections.
Choose Readable Interface Settings
PRAGMATA frequently displays the hacking grid, enemy warnings, weapon status, health, pickups, and objective information simultaneously.
Use available interface, subtitle, contrast, and color options to make the elements you rely on easiest to distinguish.
Use a Controller Layout That Supports Multitasking
The default shoulder-button dodge is useful because it can be pressed while the left trigger remains held. Avoid remapping essential actions in a way that forces you to release Aim during every defensive move.
Players with rear buttons may benefit from assigning Dodge, Repair, or Overdrive to them where platform-level remapping is available.
Common Beginner Mistakes
- Firing continuously before opening enemy armor.
- Attempting every optional hacking node during dangerous encounters.
- Watching the grid and ignoring Hugh's position.
- Using limited Attack Units against ordinary closed enemies.
- Repairing in the open without creating distance.
- Changing D-Pad weapon positions too frequently.
- Forgetting to scan optional rooms.
- Saving every Tactical and Defense Unit for an emergency.
- Completing a hack before selecting the intended weapon.
- Refusing to cancel a route when the battlefield becomes unsafe.
Frequently Asked Questions
What is the best way to fight enemies in PRAGMATA?
Aim at the target, complete Diana's hacking route to open its armor, and then use Hugh's weapon during the vulnerability window. Preserve limited weapons by using the rechargeable Primary Unit against ordinary threats.
Why does my weapon feel weak?
Most machines are heavily armored. Hugh's shots become considerably more effective after Diana completes a hack and places the target in its open state.
Should I collect every bonus node while hacking?
No. Use bonus nodes when the battlefield is under control and the additional benefit justifies the longer route. Choose the shortest path when immediate survival matters.
What should I upgrade first?
Maximum health, Primary Unit performance, Repair Cartridge capacity, and Diana's open-duration upgrades provide broad benefits. The best first choice depends on whether survival, damage, or short vulnerability windows are causing the most trouble.
Do secondary weapons have unlimited ammunition?
Most weapons outside the Primary category are limited-use units and break or expire after their ammunition is exhausted. Use them deliberately and replace them as new units become available.
What are the weapon categories?
The main categories are the rechargeable Primary Unit, high-damage Attack Units, control-focused Tactical Units, and protective or distracting Defense Units.
When should I use a Repair Cartridge?
Repair after creating distance, taking cover, controlling the enemy, or recognizing a long recovery animation. Do not wait until one additional hit will defeat Hugh.
Can you dodge while hacking?
Yes. Hugh can continue moving and use his jet dodge while Diana's hacking grid is active. This is an essential part of the combat system.
What does Scan reveal?
Scan helps identify nearby objectives, interactive objects, pickups, environmental information, and other points of interest.
Should I return to the Shelter often?
Visit when you have useful upgrade resources, want to modify the loadout, need to print equipment, or have reached a natural checkpoint. Explore the nearby area first if returning would cause you to abandon useful temporary weapons.
How do I make difficult hacking puzzles easier?
Plan the route before moving, think in physical directions, divide the path into small shapes, use tactical tools to control the enemy, and cancel when the battlefield becomes unsafe.
Is PRAGMATA a normal cover shooter?
No. Positioning and gunplay matter, but the defining mechanic is controlling Hugh and Diana simultaneously. Hacking creates the openings that turn Hugh's weapons into effective damage tools.
Final Advice
PRAGMATA becomes much easier when hacking and shooting stop feeling like two separate minigames. Diana's route determines when Hugh should attack; Hugh's movement creates the time Diana needs; Tactical and Defense Units protect that process; and the Primary or Attack Unit converts the completed hack into damage.
Start with short routes and safe weapons. Keep moving, cancel bad attempts, prepare your gun before the final input, and spend limited equipment when it prevents a fight from spiraling out of control. The goal is not perfect multitasking. It is reducing each encounter to a rhythm you can repeat.
See our PRAGMATA Controls Guide for PlayStation, Xbox, Nintendo Switch 2, and PC inputs, including hacking directions, shooting, healing, scanning, Overdrive, and remapping.
Comments
No comments yet. Be the first to share your thoughts!